Tuesday, August 13, 2013

Painting Stripes on a Wall

For the baby BOY's nursery, Casey found some fabric (pictured to the right)
and decided to go with Navy Blue as one of the main colors we use throughout the room.  Of course, one of the first things I did was get the painting out of the way.  Casey had the idea to do stripes on one wall- the wall where his crib would be-and leave the other walls the solid Khaki color they already were.  After some anal-retentive measuring and calculating by myself (Sean), I figured out how to evenly space out 4 Navy Blue stripes alternating with 4 Khaki stripes.  You can see it measured out here:

Once everything was all measured, taped, and prepped, I began painting in the stripes.  The pictures below show the succession on stripes as they progressed.


After all the stripes had been painted with TWO even coats, I pulled off the tape and, voila!  One huge key was the tape we used...Frog Tape.  Most people use the blue tape when painting.  However, the green Frog Tape has edges that don't let paint leak through or run.  I made sure to press the tape hard onto the wall to seal the lines well.  You can see below that the lines really came out sharp and clean.  


With the stripes painted, we were ready to start moving some furniture in and really get the room ready!

Refinished Dresser

In true Nestor fashion, we always do our best to get something we need for way less than full price.  As we've been setting up the baby's room, we've been on the prowl looking for furniture at lower cost that we could fix up/refinish to look the way we like.  As we were out at garage sales one Saturday, we came across a real wood dresser (so we knew it was quality) that was in great condition.  Check it out below.


Note the fantastic throw-back style hardware.  The best part (by far) about this dresser is that, after some bargaining, we walked away with it for $30!!!  If you can tell me where to get a better deal than that, let's just say I'd like to be your best friend.

The first thing we did was to take off the bulky knobs it sits on.  We also took off the hardware with plans to replace it all.  The tricky part here is that we needed to fill those previous holes before painting.  After a lot of sanding to get some old finish off and down to the bare wood, Casey decided on a Navy Blue paint to match the other stuff in the baby's room.  You can see the finished product below.  It really looks great in the room and (even though it's kind of tough to see) it really goes well with the stripes on the wall.


Do you have something you'd like refinished?  Let us know!  You can email us at sweetlynested@gmail.com.

Monday, July 22, 2013

Custom Closet Shoe Shelves

One huge selling point in our house was the amazing space in our master bedroom, bathroom, and closet.  Before we got our comfy bed, I used to take naps in the master walk-in closet because it is just that spacious! Thankfully, Casey has a great mind for making use of space without just filling it up with things.  For example, in our closet, we have this little bumped out space seen below.

We haven't really had a great place to put our shoes in the closet.  We mostly just scatter them about on the floor near our clothes.  Casey, with an idea of how to use this space, came to me one day and said, "You know what would be great?  Some shoe shelves in the closet would be great."  Whenever she says something like this, I just take it as a challenge being issued.  What I heard was, "Sean, I want shoe shelves and I'm challenging you to figure out how to do them."  Well, game on!

I got started measuring, cutting, and figuring out just the right angle for the shelves to hang from the wall.  The first step was getting all the back wall supports in place and spaced out.  (Side bar:  Casey had just gotten me a nail gun for Father's Day and I was pumped to use it for the first time with this project!)  I just popped these guys in with a brad nail and then screwed in the center right into the stud.

I made sure to cut all the back supports and shelves 3/4 of an inch shorter than the length of the wall so that I could add a piece of plywood along the side of the shelves.  The ceiling is exactly 8ft in our closet, so a 4ft x 8ft sheet of plywood was easy to rip and fit into place.  As you can see below, I got the bottom shelf in place with the plywood alongside it.  I used brad nails along the side of the shelves (going through the plywood) and along the back going into the support beams.


The shelves are made of composite board because I had extra hanging around (I would usually use more sturdy plywood, but composite board will hold up well since they are only being used for shoes).  To attach the front molding, I simply cut 1x3 boards to size and used my handy dandy nail gun to secure them to the front of the shelves.  Once all the shelves were assembled, I nailed them in place starting at the bottom and working my way to the top.  I added a toenail to the front right corners to anchor the shelves into the existing wall as well (provided some more stability).  
 After a long time painting (took two coats), the shoe shelves were finished and ready for use!  What do you think?  This was the first thing I had built without any plans to guide me!  I was very pleased with the way it turned out.

Note that I get the top 3 shelves and Casey has the bottom 6!
 Because of the angle I took the picture, it doesn't really look like the shelves are spaced evenly.  I promise the are!  Too bad I don't have great photography skills!

Farmhouse Table

      With the summers off from school, Casey and I (Sean) find ourselves with much more time for hobbies.  One thing I love is building/doing things that Casey thinks would look good in/around the house.  I have almost no imagination.  Thankfully, Casey is great at coming up with the ideas and the vision...I just do my best to make that vision a reality. 

So, for the past year and a half we've had an empty dining room.  You can see the first thing we did to furnish it here.  Still lacking a table to dine at, Casey found a farmhouse style table that she really liked on this great site that includes 3D building plans, a shopping list and cut list for the wood.  All these provisions were extremely helpful for a novice builder like myself.  Not really knowing what I was doing, I just jumped right in and went for it.  I had to learn (by watching YouTube videos and just trying things out) how to do a lot of the building techniques as I went.  Trust me, if I could do it...you can, too!  Here's an overview of how it went:

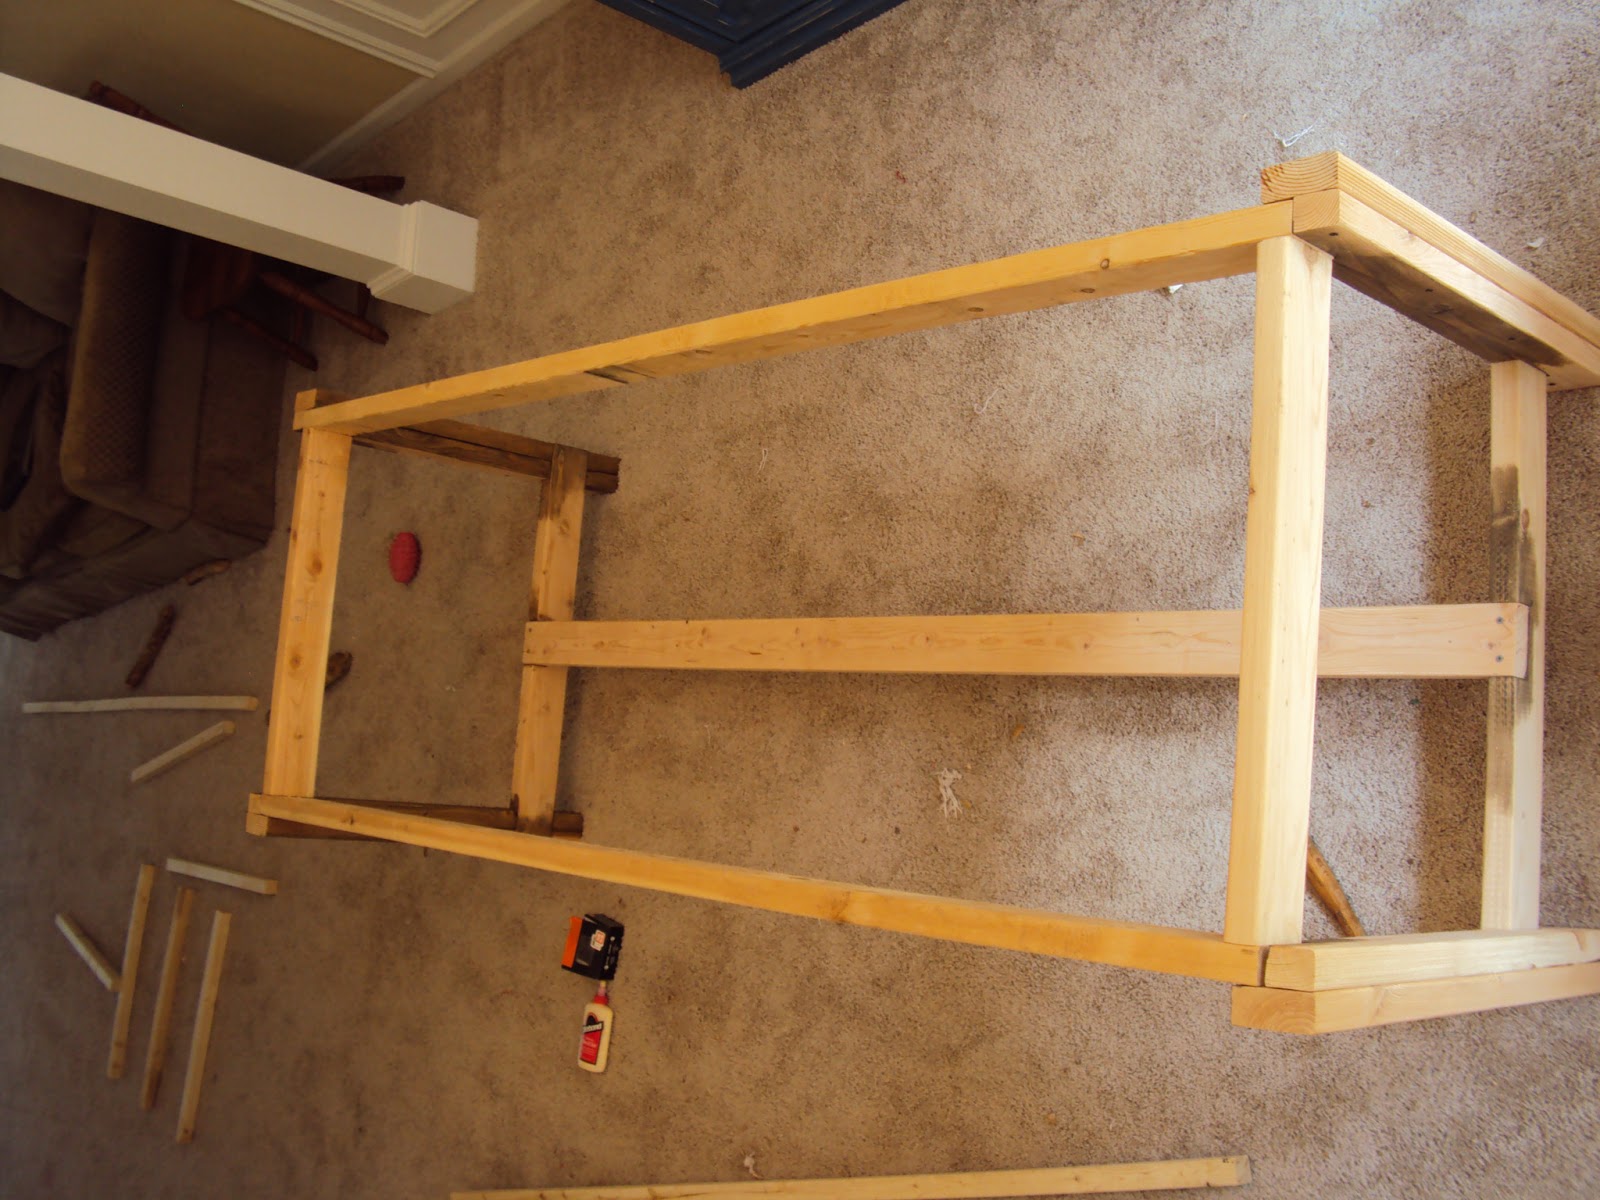
After making the necessary cuts, I put together the two ends of the frame.  I just used some good ol' screws and a little wood glue on this part.


The next part was quick and easy.  All I did here was stand the sides up (if put together properly, they will stay standing without support) and insert the stretcher board into the slots I had notched out earlier.

Next, I secured the frame for the table top.  A critical part of this step is making sure the frame is square at the corners so that your table will be square.  The table top frame fits simply into the notches made in the end pieces.
I then added these 2x2 support beams to help hold the weight of the tabletop (the tabletop is pretty heavy since it's solid wood).  Herschel's tail is making a guest appearance in the background there...he always finds a way to be in the mix.

This next part was one of my favorites because I could really see it coming together.  I pre-stained the edges of the tabletop boards so the cracks would all be stained.  Using pocket hole screws with my Kreg Jig, I secured all of the boards together on a level surface.  The top is made up of four 2x10s placed side-by-side and a 2x8 bread board at each end.  All put together, it measures 37 inches wide and 96 inches long.

 After sanding it all smooth, I put on this stain that Casey picked out called Early American.  It really came together well, huh?

The plans from Ana White's site stop there.  I decided to personalize it a little more and add some character to the underside of the table.  So, I figured out how to cut and attach these two supports underneath the tabletop.  They added a surprising amount of stability to the table.  In this picture, you can see the table next to the blue buffet we previous refinished.

The table looks great in the space and it will last us a loooooooooong time because it is well-built and solid wood.  My friend liked it so much that he asked me to make one for him to go in his house!  Would you like a great looking, personalized, long-lasting farmhouse table for yourself?  You can let us know by emailing us at sweetlynested@gmail.com.

Saturday, June 15, 2013

More gift ideas

This gift idea is probably my favorite because it costs so little, but looks very expensive and custom.  The possibilities are endless!  These signs are perfect for wedding gifts, but you could make one for anything... and a couple for yourself of course.  The only thing you need is a small piece of wood (I usually use scraps from one of Sean's projects or we buy the scrap wood from Home Deport which usually costs less than a dollar- one time they even gave it to me for free , gotta love that!) and some paint.  The first thing I do is paint the wood a solid color, but you can leave it plain if you want.  Then, I print off what I want to put on the board in a cute font off my computer.
 Then I use a ball point pen to trace around the letters.  You have to press down pretty hard so your pen will make an indention in the wood.  Then, you peel off your print out and paint around the inside of your lines.  Once again you don't have to worry about it staying in the lines perfectly because you won't see them and the indentions help to keep the pain contained.

 I like to add the names on top to give it an extra personalized element.  But you just do the same process and voila!  Great wedding gift you know the couple will love that cost you a couple of dollars.  Can't beat it!

Thursday, June 6, 2013

Inexpensive Gift Ideas

Summer always brings lots of weddings, baby showers, and house warming gifts.  I always want to give a personal gift but never have a lot of money to spend.  So, I'm always on the look out for cheap diy gifts.  


I wanted to make a personalized planting pot so I bought a plain clay pot from Home Depot and spray painted it black with some left over spray paint we had in the garage. 


Then I printed off what I wanted to put on the pot in a font that I liked and traced around the letters on top of the pot.
Since the paint hadn't been dry for very long it scratched the black paint off making it easy to see the tracings.


 Then I painted inside the lines.  You don't have to worry about staying inside the lines because you're painting over them anyways.


I thought it turned out so easy I made one for Sean's sister as well.


And then one for our front porch too! 


I used the left over paint from the dresser to add some color and the purple flowers add some nice inviting color as well.


Monday, April 1, 2013

Dresser into Buffet

When a friend of my mom's asked me if we wanted her old dresser I immediately said YES!  You can't beat free.  

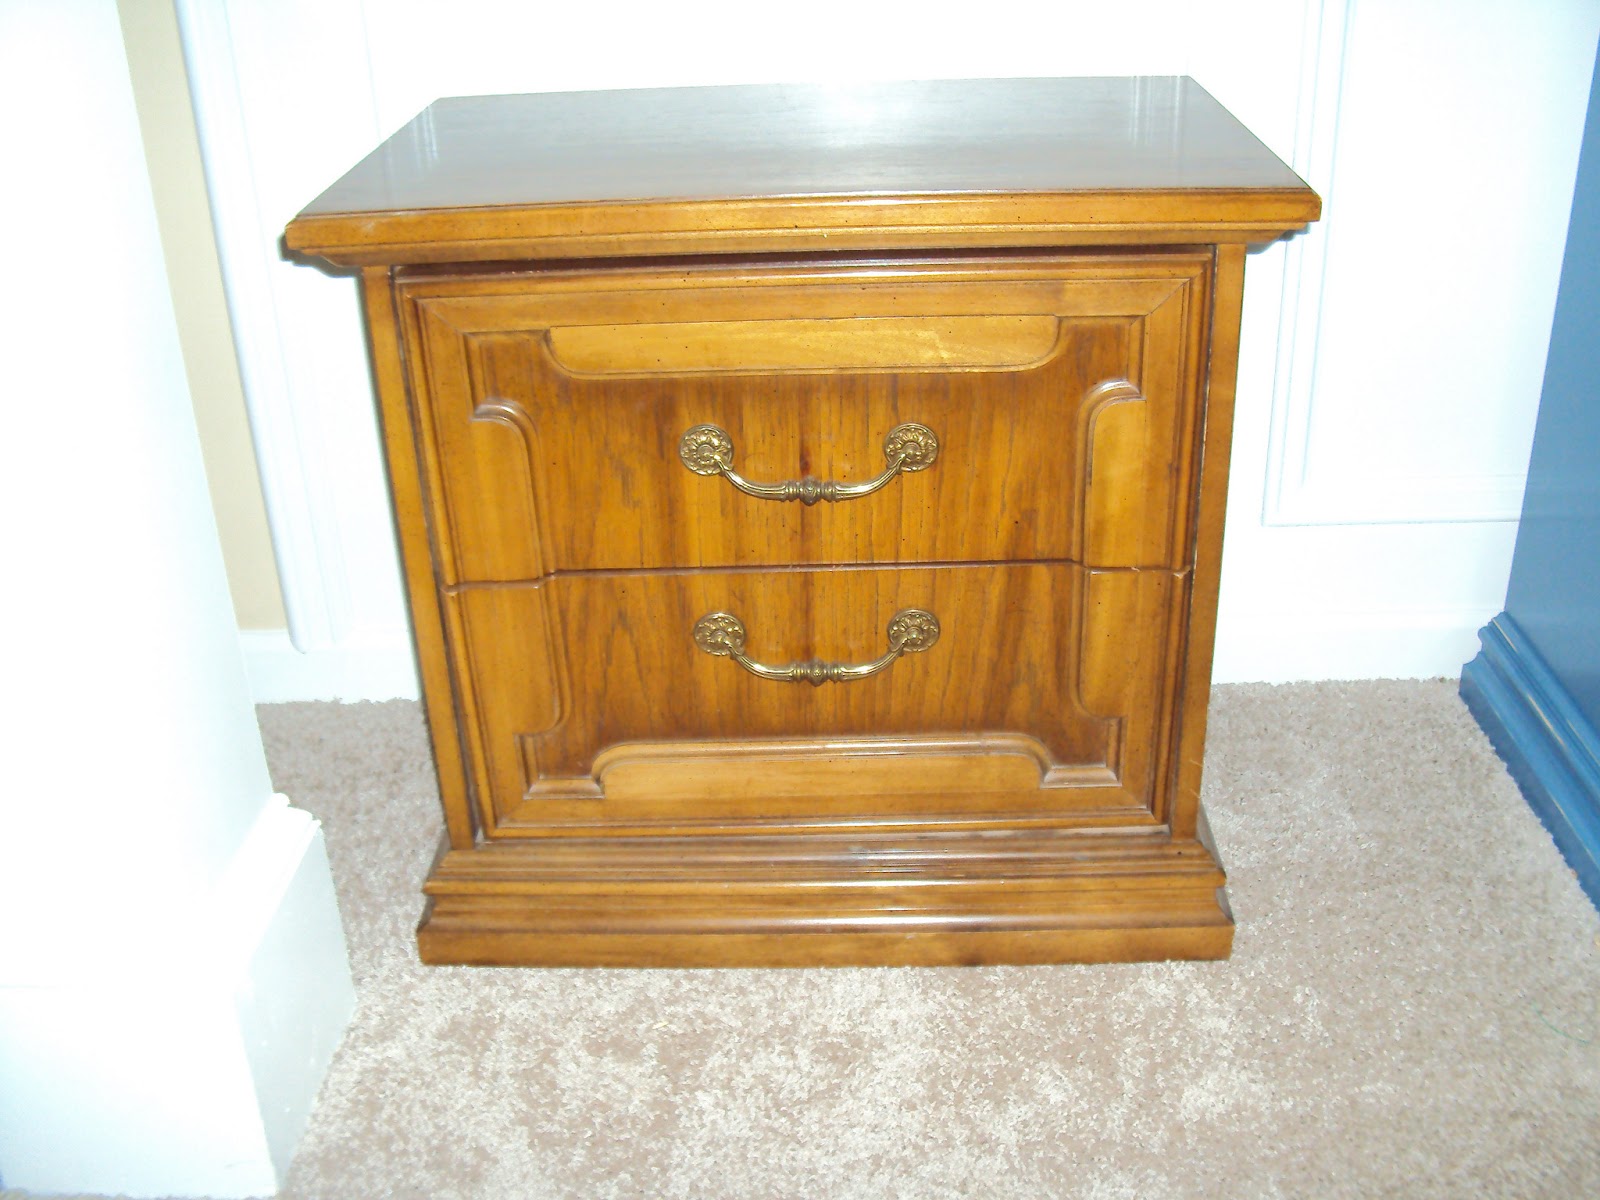
Somehow I deleted the before picture, but here is a picture of the matching night stand.  You can see what it looked like before: 80s wood with some lovely brass handles.


We had just recently redone our bedroom and I needed a new dresser.  Now, I'll admit when I saw it I was a little doubtful.  It wasn't exactly what I was hoping for, but once again, you can't beat free.  So, I took it home anyway.  After thinking it over I decided it would make a great buffet for our dining room (even if it is the only furniture we have in there right now). I think it turned out pretty cute and adds some needed color to the room.